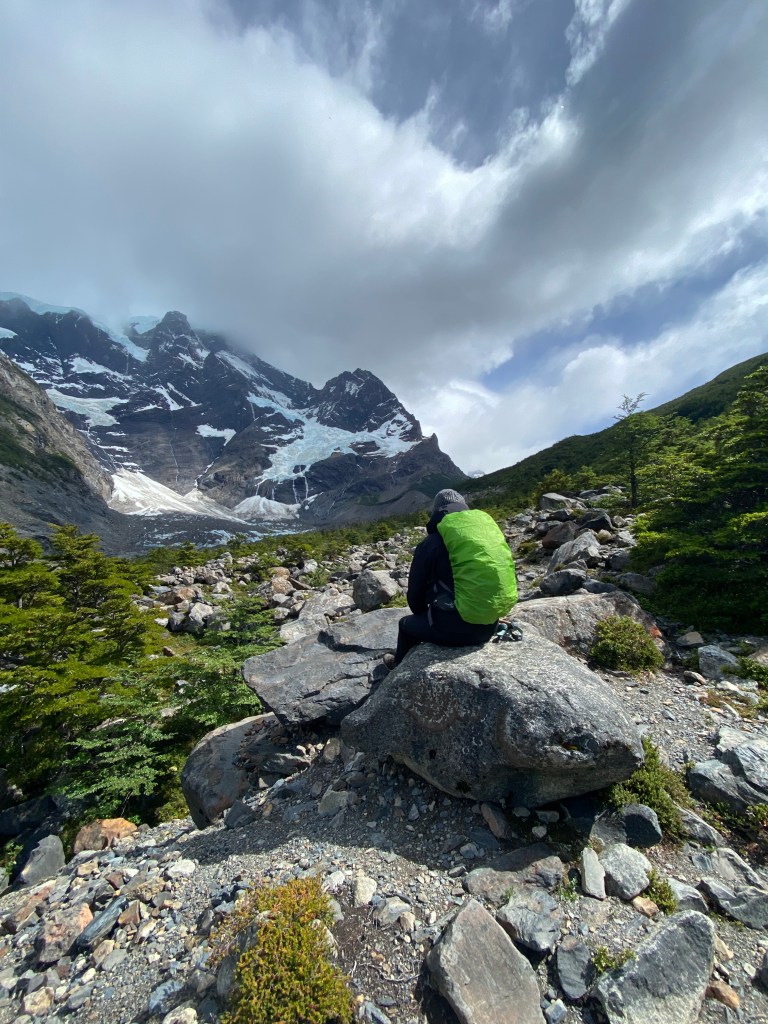
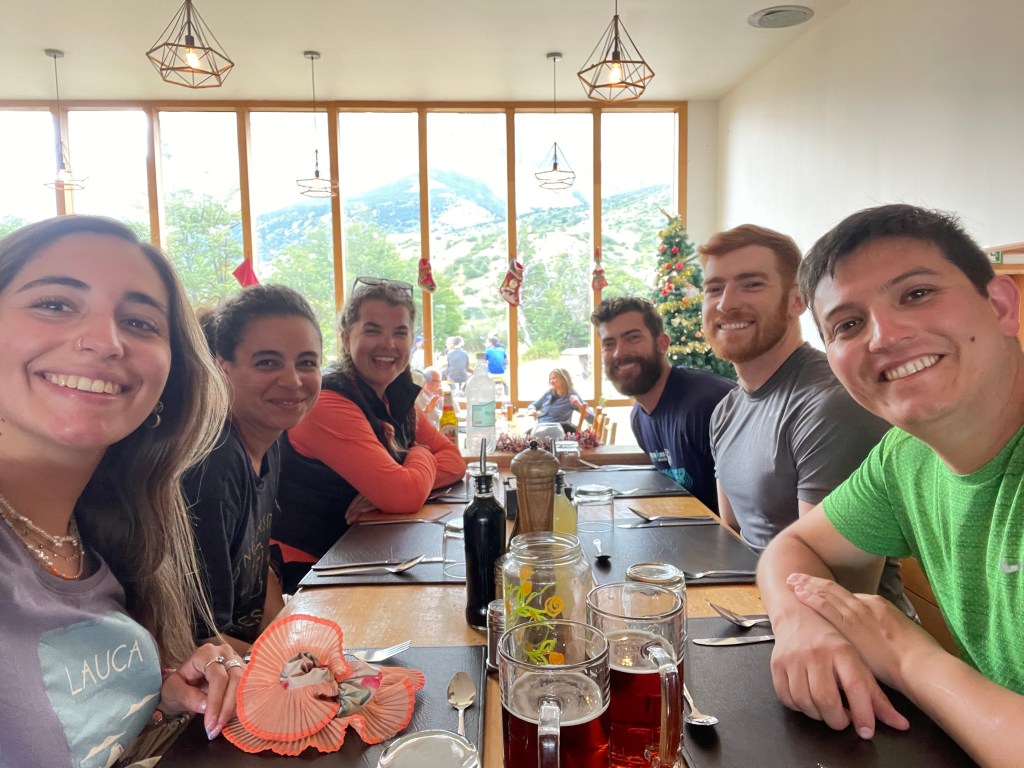
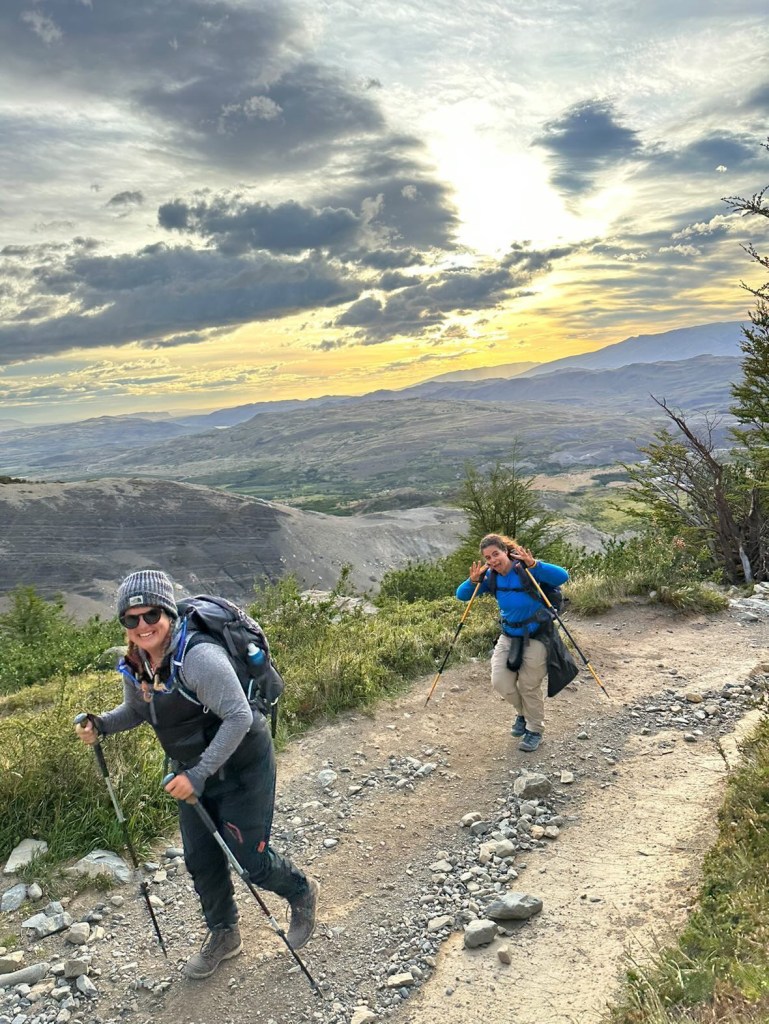
Go to Patagonia they said. Do the O trek they said. It’ll be fun they said. Was it fun? Hells yes. Was it also exhilarating, terrifying, beautiful and one of the hardest things I’ve done so far in life? Also hells yes.
When Talia and I had initially discussed hiking Chile for the month of December there was one thing I knew I wanted to do; I wanted to go to Torres del Paine National Park to hike either the W trek or O trek. I’d heard of both in the past and was pretty confident we could do either one. At first we decided on the W trek but after a little bit of research we decided we were capable of doing the O trek. So that’s what we decided to do. I wasn’t sure how I was going to survive 8 days of straight hiking but I was strangely excited.

One thing was very clear after a couple of days on the O trek, our research had failed us. We had NO idea just how difficult some of the hikes were (for people on our level) but in addition to that literally everyone we befriended during the trek were talking about how much misinformation there is out on the internet on the O trek. So one of the big reasons why I decided to write this blog post (and such a lengthy one at that), is to try and put as much information in the hands of the next year of O trekkers. Due to this fact, I’m only going to discuss how we did the O trek. To be clear, this is not the only way to do it, you can book it yourself through a multitude of various websites, or do a group tour.
Firstly, Talia ended up having a contact (for all intensive purposes she’s essentially a W or O trek travel agent) from when she was previously in Chile who was able to book everything for us. I had originally looked at doing it myself but I after having a quick look through the various camping sites I realized it just made more sense to have someone else do it for us. Normally I’m all for doing it myself but we started booking this in July a month after the camping sites had already opened for the season and certain dates were already sold out. I was concerned about not being able to book the entire hike the way we wanted too etc. I figured having this woman book for us was the safest option to ensure we didn’t have even longer hiking days. I say that because had one camp been sold out Talia and I would have been forced to continue to the next and for us that would have been too much in one day.
Talia and I also decided to do the fully equipped tent option. This meant that every night when we got to camp our tent would already be set up with sleeping mats and sleeping bags. Additionally we did the full board option meaning that we had breakfast and dinner at every Refugio. When we arrived to breakfast in the morning we’d be handed a boxed lunch as well. Originally Talia had wanted to carry everything and I had approached her with the full board option instead. I mean, I like hiking, I swear I like hiking, I questionably even love hiking however, carrying a 50lb pack for 8 days was a level of miserable I just wasn’t ready to contend with and for me this ended up being exactly the right idea. My little 34L Osprey pack was absolutely perfect for this trek. It even ended up being a bit heavier than I wanted but other than one day my miserable levels stayed within acceptable levels and I actually had a really great time.
Okay so getting back to things, to recap we decided on the full board, fully equipped tent option. We ended up paying 920 Euros per person which included everything mentioned but the kayaking. Our total cost was slightly higher because we went over NYE and you pay extra for the food that evening (also the case if you hike over christmas). Kayaking was an additional 100 Euros or so per person. Additionally we decided to do the O trek in 8 days which was pretty much what every other person I met decided to do as well. For the record we probably would have thrown in a rest day or at least lengthened the trek by a day or two to shorten some of the longer days had we known exactly what we were getting into. So jumping off that let me jump into our itinerary.
Day 1: Puerto Natales —> The Welcome Center (aka Central) —> Seron
Day 2: Seron —> Dickson
Day 3: Dickson —> Los Perros
Day 4: Los Perros —> Grey
Day 5: Grey —> Paine Grande
Day 6: Paine Grande —> Los Cuernos
Day 7: Los Cuernos —> Central
Day 8: Base Torres (in and out hike from Central) —> Puerto Natales
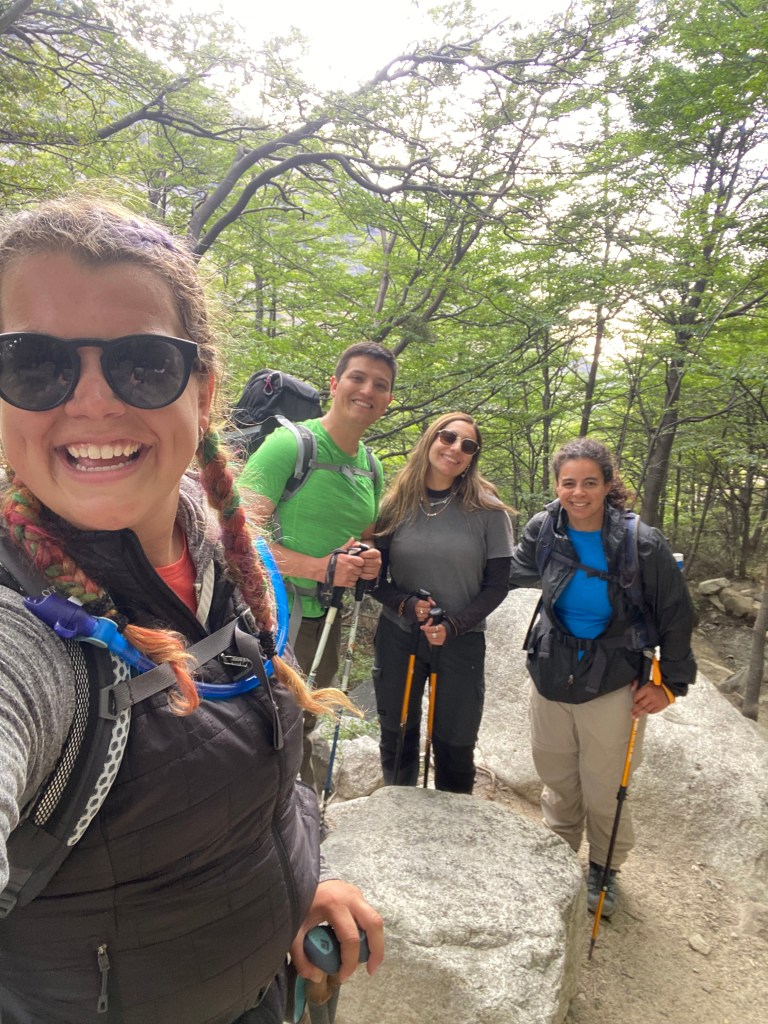
From Day 1 until the end of Day 4 you’ll find that you’ll be hiking with the same people. Unlike the W trek, the O only goes in one direction, counter clockwise, although it can either start with the hike to Seron or with Base Torres (make Day 8 become Day 1 and push everything forward a day). Base Torres is as one O trekker put it as arguably ‘the Mecca,’ of the O (or W) trek so we really wanted to leave it for our last day. As someone who has only day hiked before and never backpacked, the community that the O part of the trek created was beautiful. It was so… inspiring to have this group of people who before day 1 were strangers to me become my trail family. We cheered each other on. We complained to each other. We didn’t question when someone fell we were just there to pick them up. I don’t think I’ve been in a situation as an adult that formed this kind of community so easily, so quickly before.
Day 1 (Puerto Natales to Central to Seron) began with a bus ride from Puerto Natales to the park entrance. There we had to check in before getting in line for the mini bus that would bring us to central. The mini bus is an additional 3000 chilean pesos per person and was not included in our package. The hike from Central to Seron was an easy 13km. The signing from the welcome center wasn’t the best so here’s some directions. Exit the welcome center as everyone else is doing and there will be a trail to follow. Follow the trail past the first righthand turn where there is a building (this is the Refugio for Central that you’ll need to get to on Day 7). Take the next right hand turn that looks like a road and continue to follow that up a hill, you should start seeing signs for Seron from there. Enjoy the next 13km and if you’re there in December enjoy the wildflowers, we loved them.
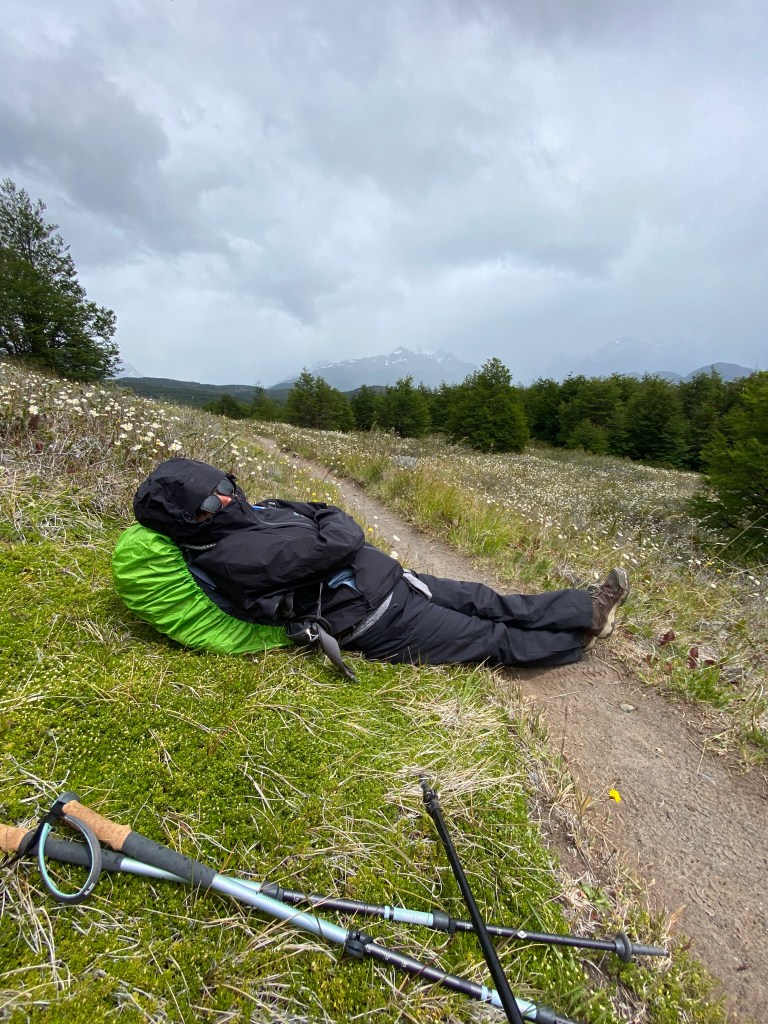
As for the trail itself there were some ups and downs but for the most part it was flat and the terrain was even. There were some parts towards the beginning that we felt were poorly marked but we managed to make it to camp for the night after all. Also I have to note, this was one of two days that I fell. Literally barely 30 minutes into the hike I caught my foot on a rock that was a bit more stuck out than I thought and I was flat on the ground 10 seconds later. I’m grateful that I got up from that with just a few scrapes but it’s just a reminder that you can hurt yourself even on easy trails. Also if you’re following Alltrails at all this hike may not be the same as it is on the app. We were ‘off trail’ for quite sometime but I could tell on the app that it was a trail just not the one that the app seemed to think was part of the O circuit.
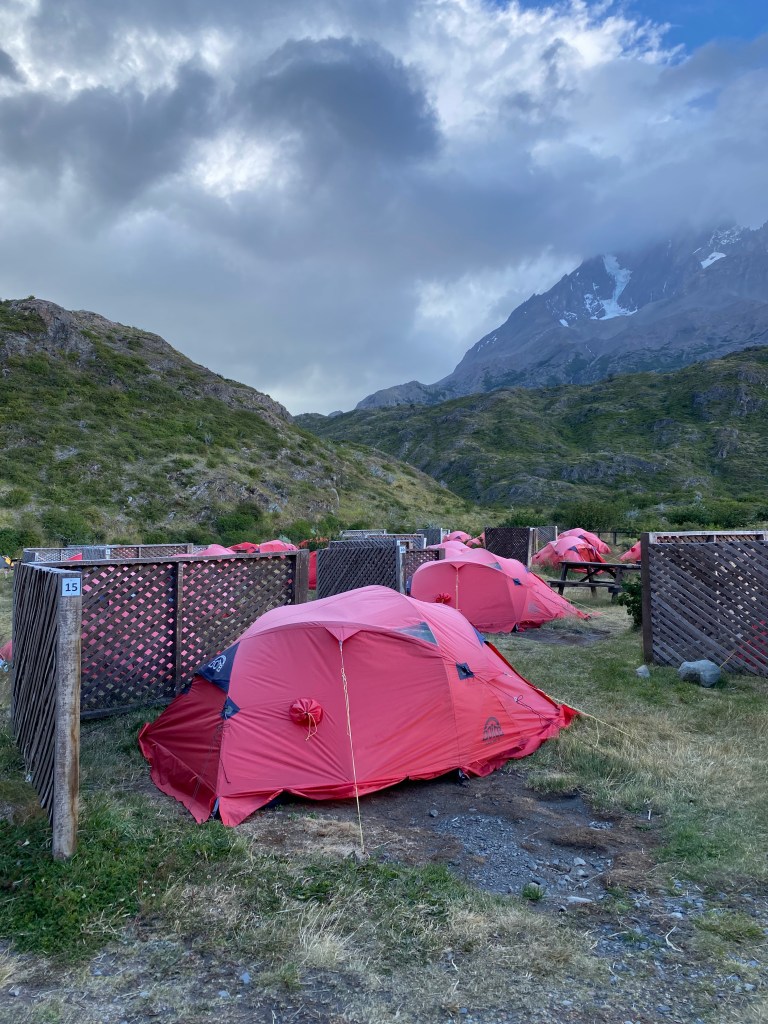
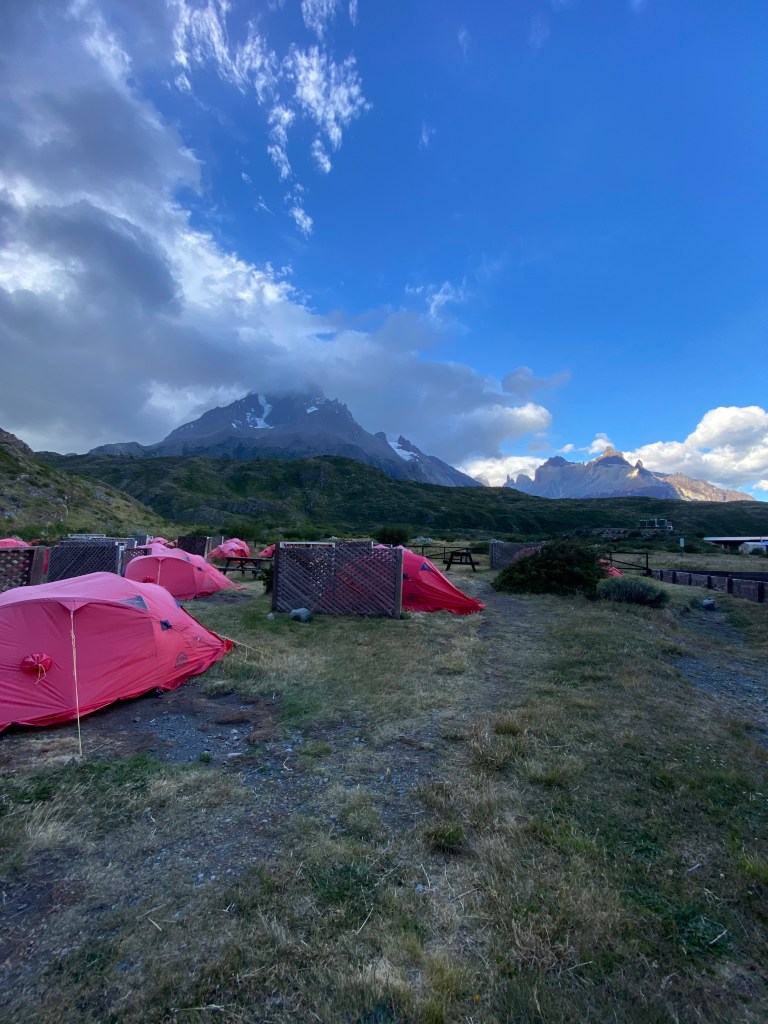
At the camp site: If you have a fully equipped tent you’ll find that you’ll be on a platform for the evening. This was also the smallest tent of the trip for us. If you’ve carried your tent they’ll have you set up in the field next to the one where all of the fully equipped tents are. The Refugio has one main dining room which is also a hang out space when meals aren’t happening. This is also where the minimart is and where you can charge your phone. Shoes are not allowed inside if it’s raining/muddy. This was one of our favorite camps but it is also one of the smallest. As for the other facilities, there is a tent which is where the kitchen is. All cooking has to be done within the kitchen at all Refugios to reduce the risk of wildfire. As for the toilets/showers you’ll find one row of four doors, two are toilets and two are showers. I actually thought this was one of the nicest bathrooms of the camps I just wish there were a couple more facilities. The drinking water tap is easily accessible and can be found out the outside of the Refugio near the tent for the kitchen.

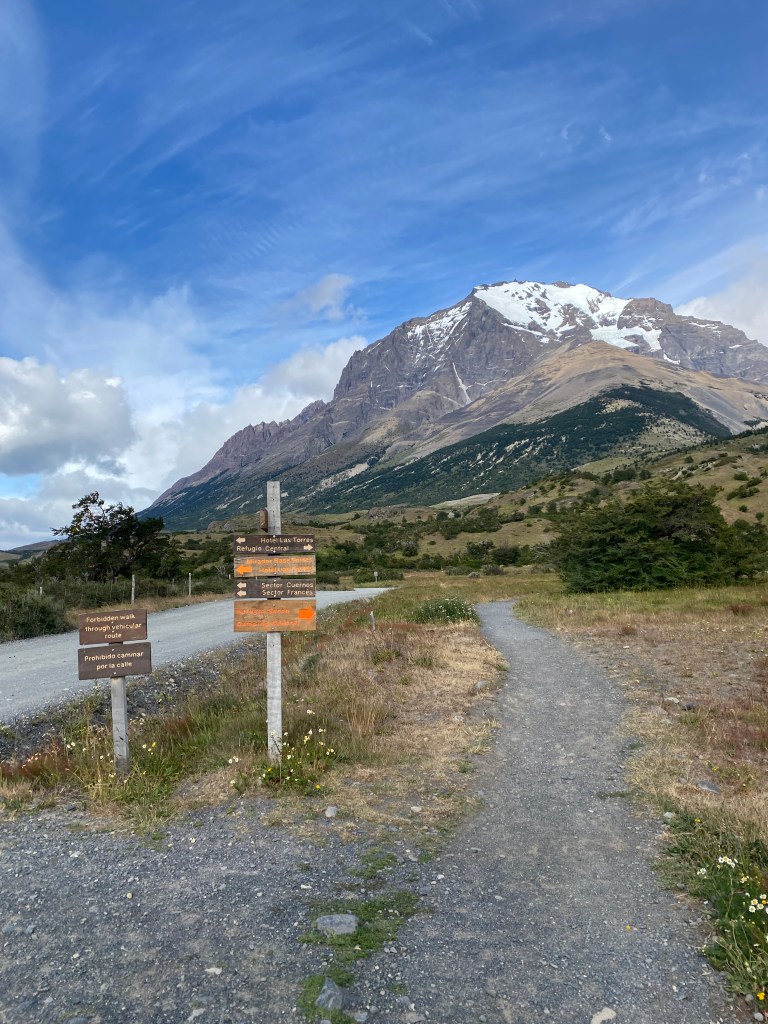


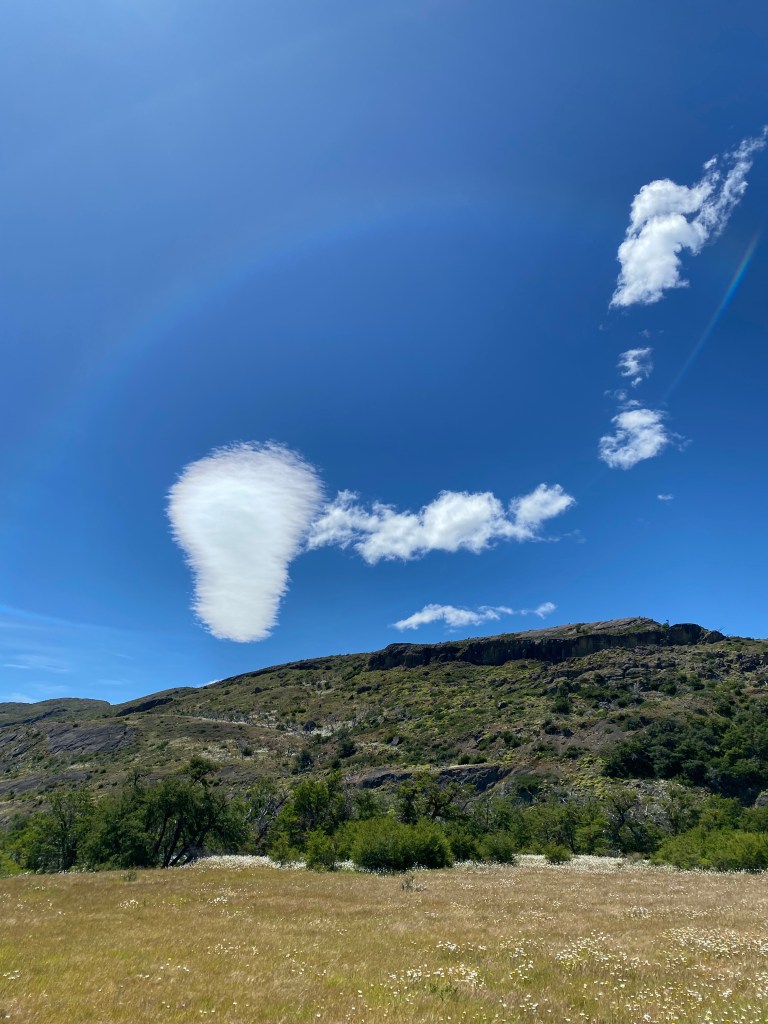

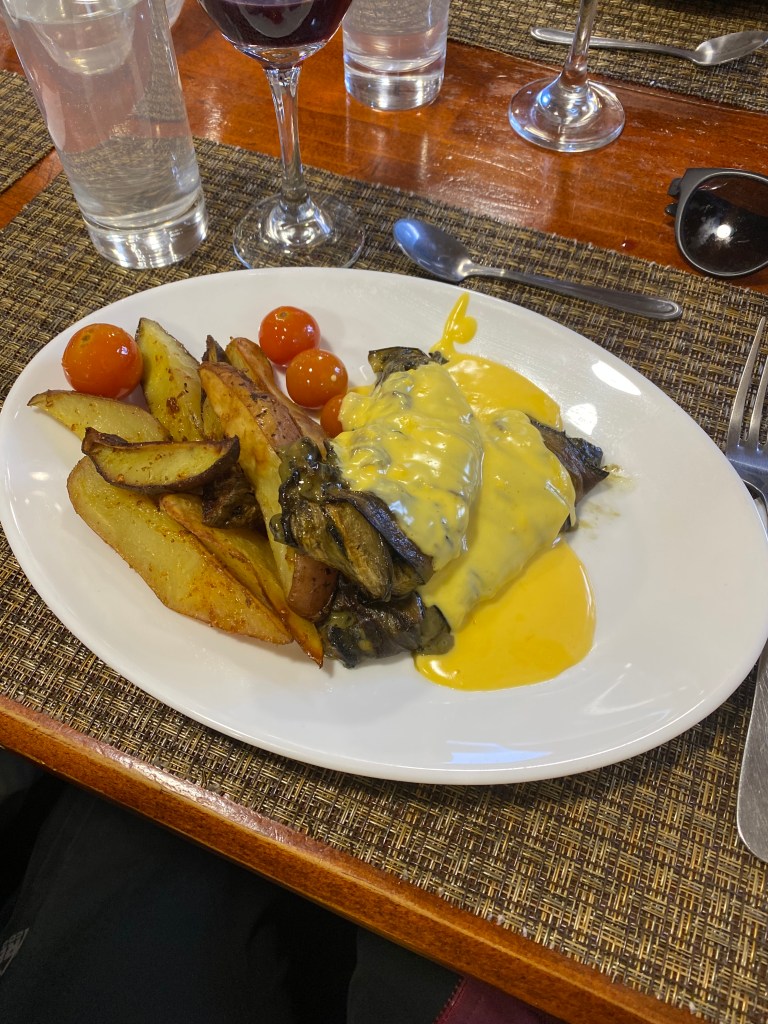
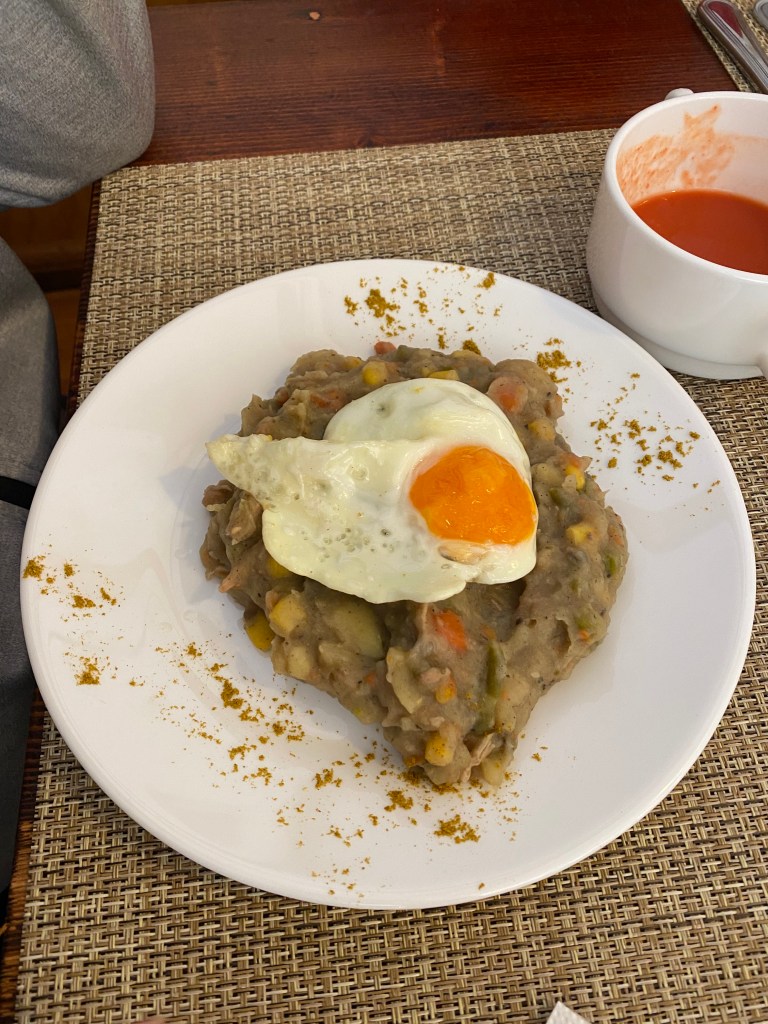
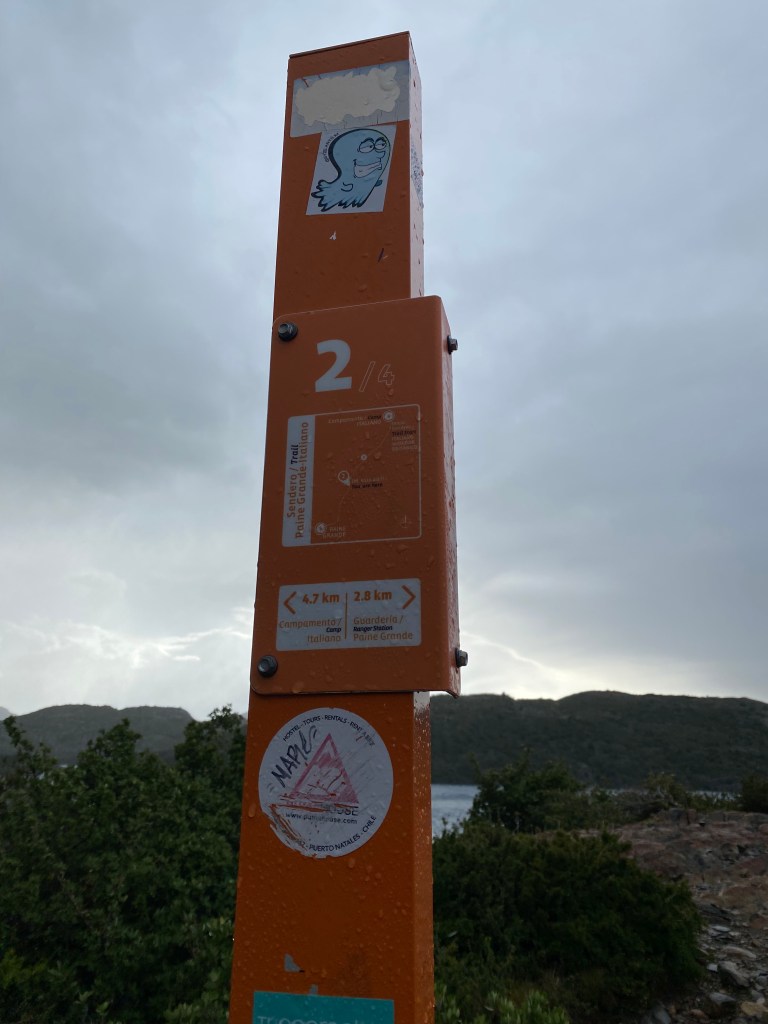
From left to right to bottom: Taken of me right at the start of the hike; When we finally found a Seron sign; One of the many fences/signs you come across while trekking; Talia and I at the first real ‘view’ of the trek; the funky clouds of Patagonia; veg dinner at Seron
Day 2 (Seron to Dickson) was a moderate 18km. As we were told originally we’d go ‘up and down a few times,’ we quickly realized there would be quite a few hills to walk over. What made the hike even more difficult for us personally was that it rained for the majority of the hike. We did get a bit of a reprieve and a lovely rainbow over a lake which made the rain worth it, but there was definitely a moderate level of misery for a few hours. About halfway through the hike you’ll have to check in at the rangers (CONAF) station in Coiron. Directly before the station there will also be an outhouse you can use if you so choose. From the station it is an additional 9km, the ranger will tell you it’ll take 3 hours or less to get to Dickson. Additionally, no one tells you that you’ll see Dickson before you actually arrive and once you see it you’ll realize there’s quite a steep and sudden hill you have to go down in order to get to it. I don’t know about y’all, but going down a steep downhill is one of the last things I want to do after walking 18km.
At the camp site: Dickson has more buildings than Seron does and they looked like they were upgrading the CONAF station while we were there. There is a mini mart that seemed to have bit more to it than at Seron. If you want snacks for the John Gardner Pass and need to pay by card, buy them here. We found that Los Perros was cash only when we were there. At Dickson the kitchen area is indoors and also a good place to hang out. As for the bathrooms there were two toilets and two showers per gender. I found these showers to be one of my least favorite on the trek but they do have hot water. You’ll find that if you’ve decided to sleep in a Refugio bed instead of a tent that you’ll be sleeping in the same building as the dining hall. This was where we celebrated New Years Eve and the food (and vibes) were fantastic. The kitchen staff just seemed so happy to be there it was electric. Our fully equipped tent did not have a platform this evening but it was slightly larger tent than the tent at Seron. I would also make a point to check out the lake before you leave, it was gorgeous right before nightfall happened.

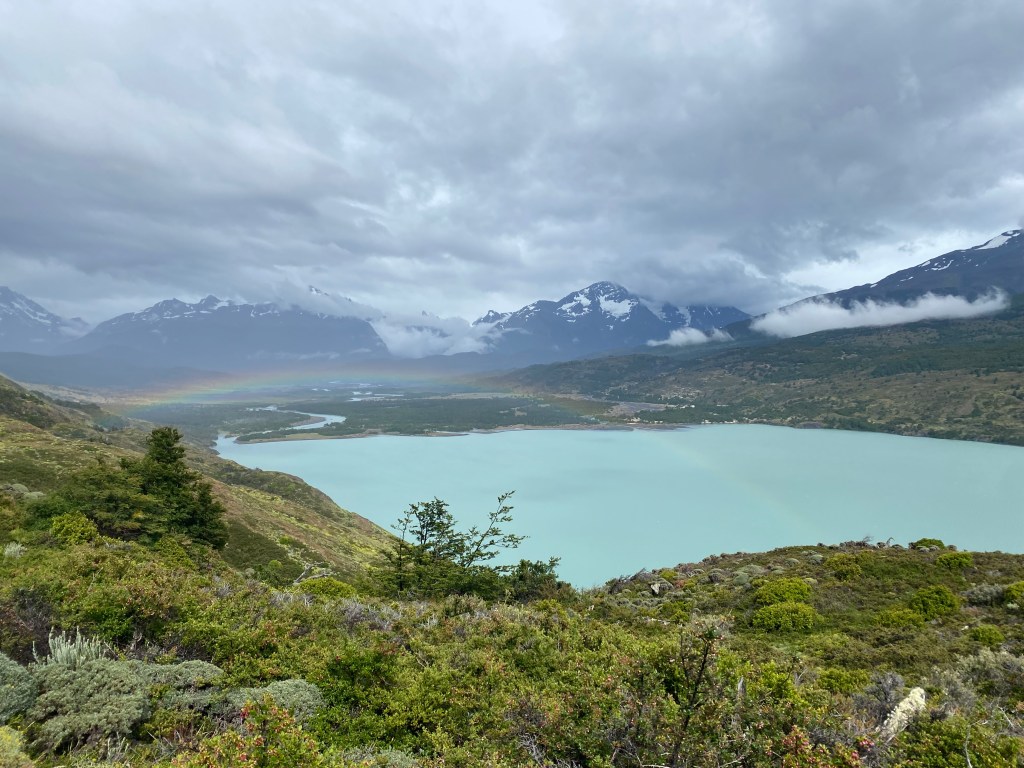


From left to right to bottom: Wildflowers just leaving Camp Seron; The lake with the rainbow I wrote about; Protecting myself from the rain; the boardwalk that exists during the 2nd half of the Dickson hike; Talia’s carnivore NYE food; my veg NYE food; some sort of passionfruit dessert; Talia, myself and our O trek crew; Camp Dickson and my last photo of 2022
Day 3 (Dickson to Los Perros) was a mostly easy 12km. There is an elevation gain this day as you mostly walk through a forest. Once you exit the forest the trail becomes much more rocky, and more up hill. We did lose the markers a few times over but were able to mostly follow the trail by the end. The weather held well in the morning but by the time we were out in the open it was raining again so we made a point to stop at the Mirador for the Los Perros glacier before we went to camp. We were told it’s only a 10 minute walk from camp to the Mirador, I would argue it’s a bit longer than that and it is not a flat path. Just something to note in case you’re someone who doesn’t like to leave camp once you get there. You might want to just stop at the mirador along the way.
At the camp site: Los Perros is cold due to the elevation. Be prepared to wear all of your layers. Again our fully equipped tent was on a platform and we had the same tent as we did at Dickson. While we were there Los Perros had no electricity which from the sounds of it was quite common. Originally we were told we’d had to rent a cooker and buy food to cook for the evening. A couple of days before we left for the trek we found out that Los Perros was actually offering meals again. This wasn’t my favorite meal of the trek but it was pretty good all things considered. Something we didn’t know ahead of time though, but you should know is that Los Perros only has cold water. So most (honestly probably everyone) decided not to shower this night. There is a mini mart and the kitchen is also inside but if people aren’t cooking it is cold inside as well so just be prepared to wear everything. Something important to note, breakfast is usually served at 6am if you’re full board. We were warned we were going to have pretty tough conditions (wind and snow) for the pass so Talia and I wanted to leave before then. They were nice enough to push the breakfast up to 5:30 but they were still running late. We ended up just grabbing out lunch boxes and making a run for it. If you’re a slow hiker doing the full board option and you’re told that the conditions are going to be poor I’d suggest skipping breakfast/grabbing the lunch box and leaving at 5 or staying just long enough to grab the lunchbox and run. Additionally if you are a beer drinker, be aware that the mini mart does not sell beer (or any alcohol) and is cash only (this was the only camp that was cash only, in fact most camps preferred card because they did not have a lot of change).


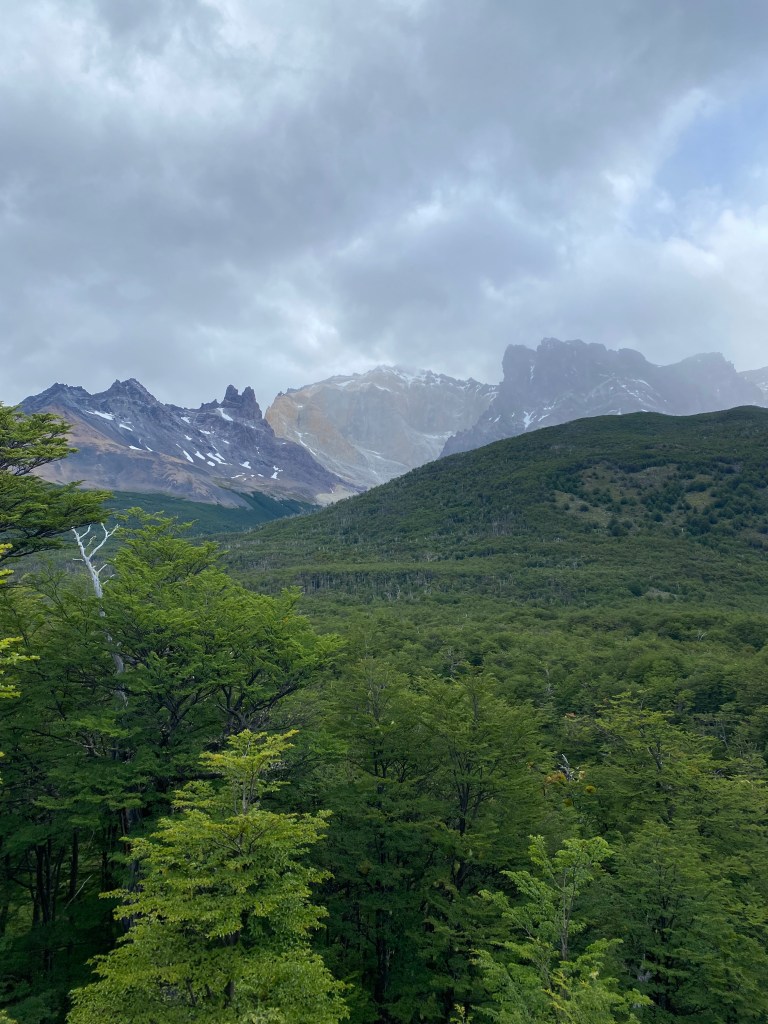
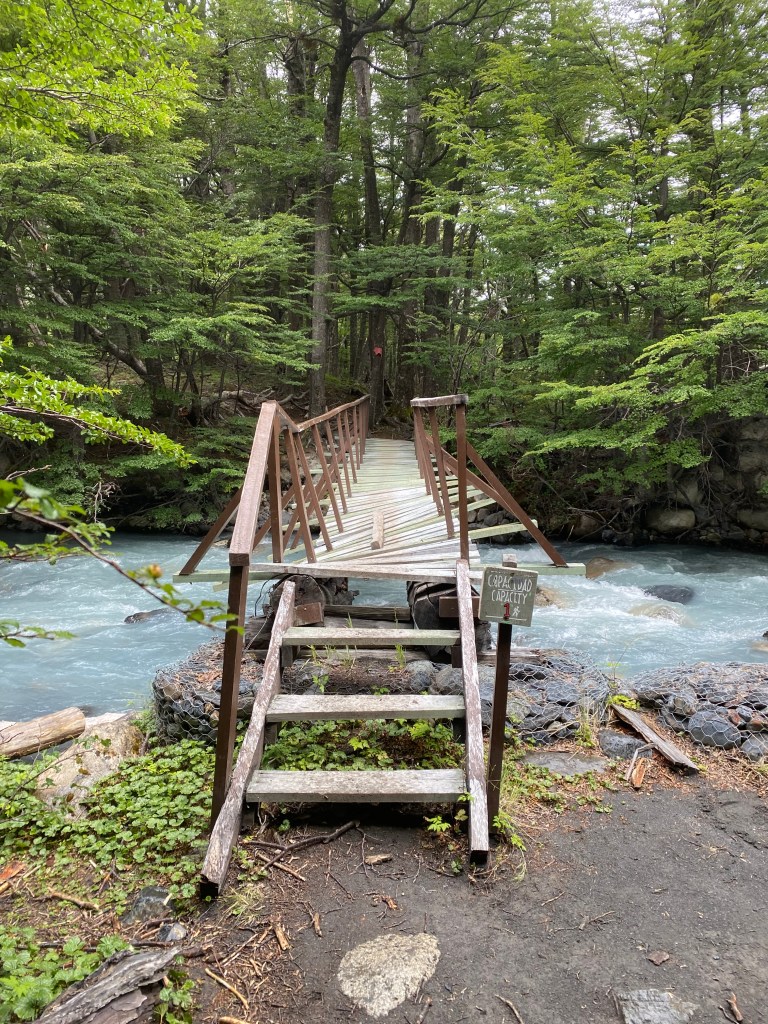
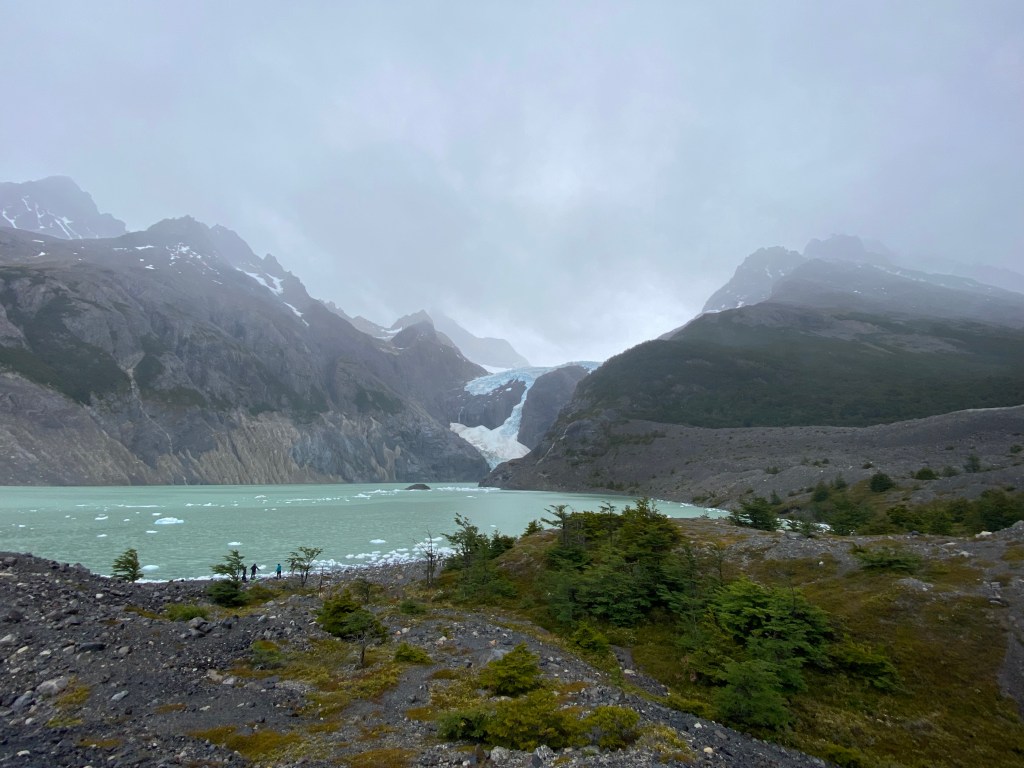
From left to right to bottom: A shot back on Camp Dickson as we were leaving; Views within the forest; the forest canopy; the views this day were stunning; this bridge was more stable than it looked; Laguna Los Perros and Glacier Perros
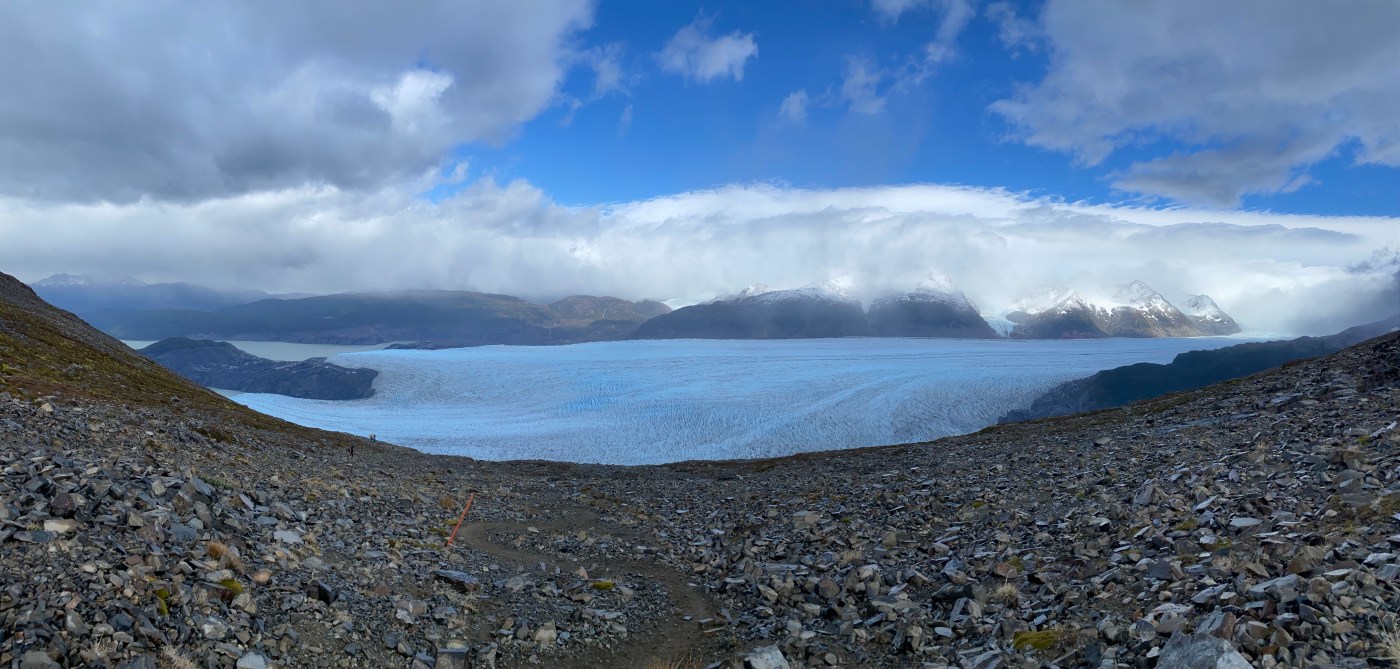
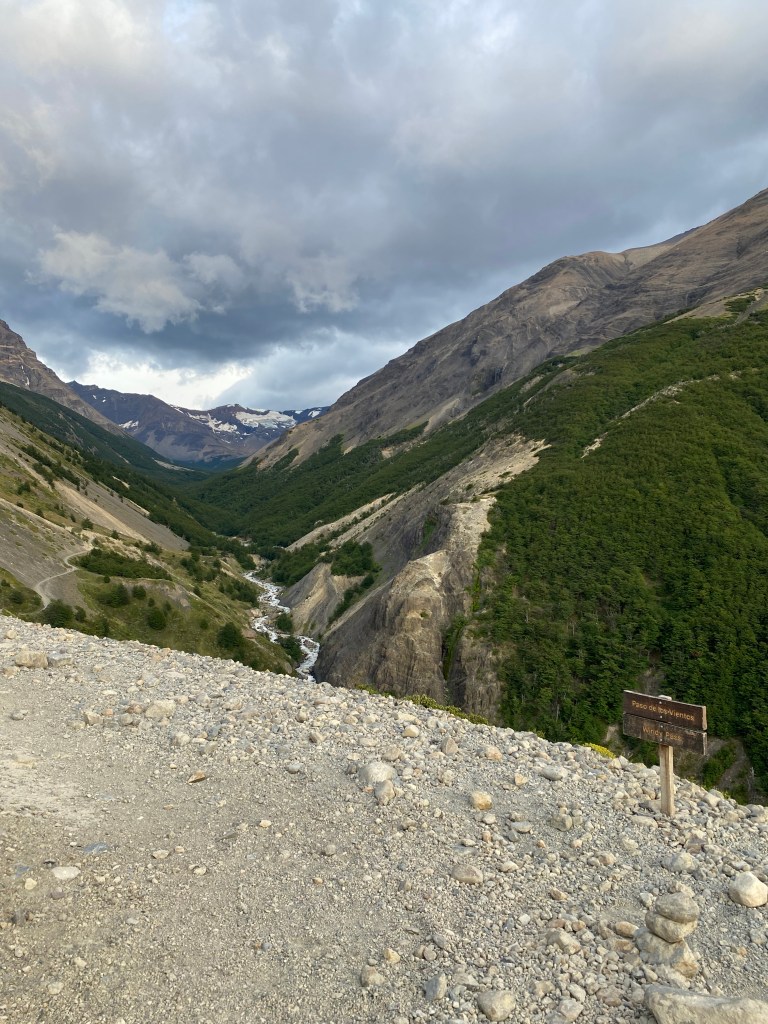
Day 4 (Los Perros to Grey) was the day from hell. I normally don’t curse on here but that’s the truth. It is a difficult 15/16km with a 900m elevation change. You will hike up through a forest before hiking in the open for a while. You will find that you’ll pass through at least one more wooded area before really getting to the open area of the pass. Our conditions were abysmal. We were warned the day before that the wind would pick up at around 10am and that we really needed to be on the pass (or preferably over it) by then. Well, as you can guess from my luck on day 1, the wind was terrible. It was already snowing while we were in the first wooded area. Once we exited it was raining/snowing and turning into blizzard conditions. The blizzard conditions continued until we were over the pass, on the downhill the weather did change for the better. Be careful on the pass if you have bad conditions, don’t be afraid to sink your poles into the ground and hold on for dear life when the wind gusts are threatening to blow you over. I saw multiple people get swept off their feet by the wind, also be mindful of the markers. We were following some other people and it turned out they were off the trail. They were up a hill a bit so they were able to see where the actual trail was and shout at us so we could correct ourselves before the same mistake happened to us. Once you make it over the pass, Paso (a CONAF camp) is further down the trail than you’re going to expect. We thought it would appear quickly after the pass and that’s not the case. You’ve got quite a bit of downhill to do through the open and through the forest before you’ll hit. You will have to check in here before you can continue on to Gray. From Paso it is estimated to take another 4.5 hours to get to Grey. You’ll pass over 3 suspension bridges and an elevation increase of 150m. Shortly before the second suspension bridge you’ll find more people on the trail. You have now joined the W trek. Prepare yourself, Grey is larger than any of the other campsites you’ve been at yet (if you started at Seron) and the vibes are different.
At the campsite: Our fully equipped tent did not have a platform this evening and was sadly on an incline. This was the first of a couple of nights of not so great sleep. Grey has one building that has a mini mart, toilets (4 stalls for women), a place to charge phones and the kitchen. The next building is just for showers (there were four for women) and yes there’s hot water. The last building is where the dining hall/bar and also the beds if you’re staying in a Refugio. Depending on when you arrive at the campsite will depend on what time you eat dinner. It was a bit of a shock to the system seeing all of the people and how loud the dining hall got at night.
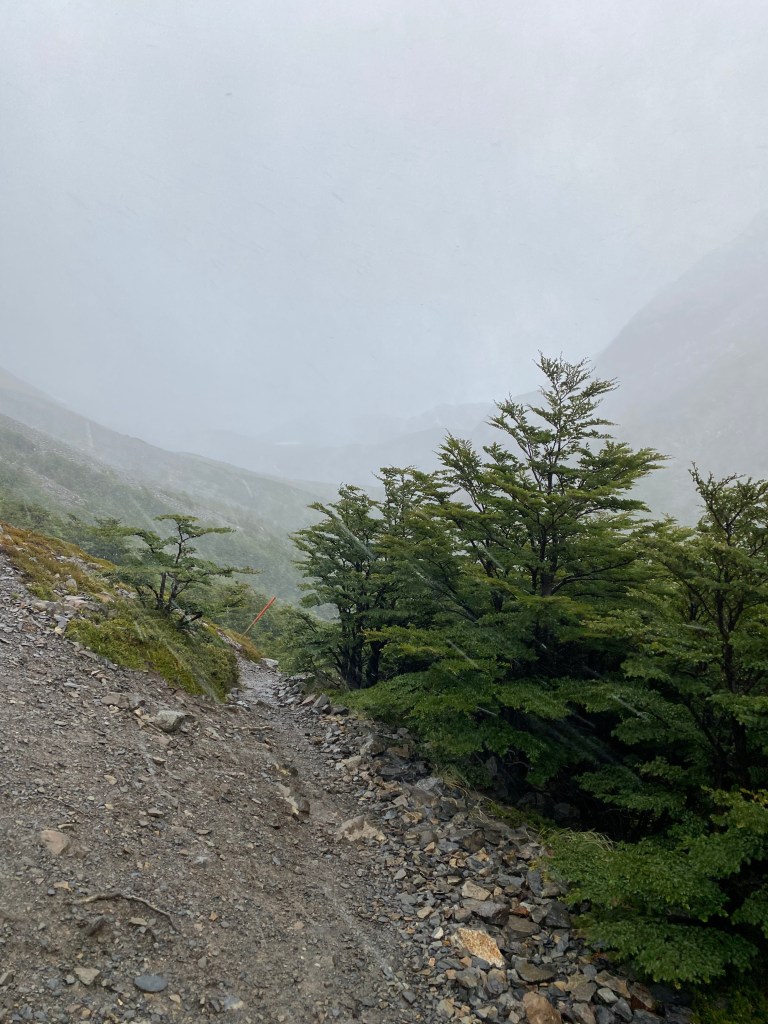


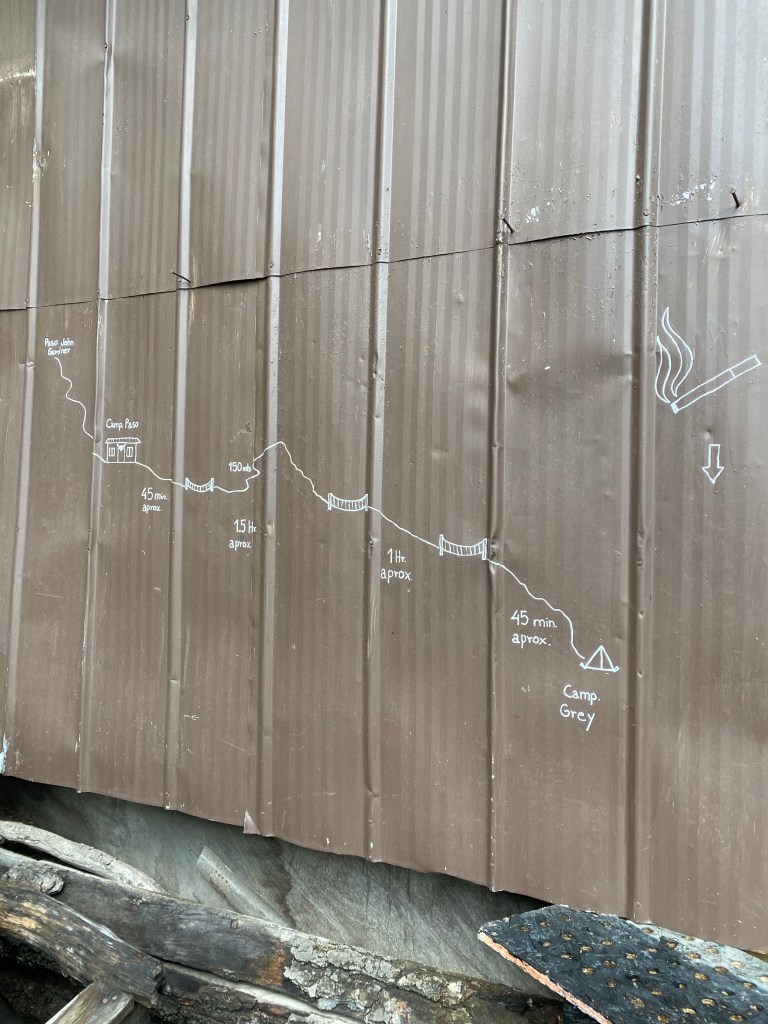


From left to right to center to bottom: The beginning of the blizzard taken right after we exited the first big forest patch; The only time it cleared up near the pass so I snapped a quick pick of the glacier thats visible on the pass (not Grey Glacier); First views of Grey Glacier, notice the ice on my camelback tubing; Me with Grey Glacier, Talia and I with Grey Glacier in the background; another shot of Grey Glacier; A panel of a building at Camp Paso stating what’s left of the trail; Wild flowers with Grey Glacier in the background; One of the three suspension bridges between Los Perros and Grey
Day 5 (Grey to Paine Grande) is meant to be one of the easier days. Since it is one of the easier days, people opt to spend the morning in Grey to either kayak or hike on the glacier before heading onto the trail. If you want to kayak or hike this is something that should be booked months in advance, spots are limited and sell out quickly. One thing to keep in mind is that the trail is meant to close at 3pm. We went kayaking in the morning and then stayed for lunch before heading out on the trail. This trail is just under 12km with some ups and downs. We did deal with a fair amount of wind while on the trail which made it a bit unpleasant. If you don’t have an interest in kayaking or glacier trekking I would say leave earlier in the morning so you don’t experience the wind as much (wind almost always picks up in the afternoon).
At the campsite: Our fully equipped tent did not have a platform but it did have a fence around 1/2 of it to protect it from the wind. The wind in Paine Grande is no joke. Again our tent was on an incline unfortunately… I honestly wonder if you come into the campsite early enough and notice it, if they’d let you switch. It’s an idea at least. This was my least favorite campsite. The women’s room did have four stalls for toilets and four/five stalls for showers, however the conditions of the bathrooms compared to everywhere else we’d stay were abysmal. I would highly suggest making sure you have your own toilet paper for Paine Grande because we got to a point where there was almost nothing even after people mentioning it to the staff. The food also left a lot to be desired. I ended up ordering a pizza from the bar for dinner. The kitchen is large but not super clean either. I did not check out the mini mart so I can’t comment on how well stocked it was.


From left to right to center to bottom: Talia and I ready to kayak; Taken while on the kayak, there was this one massive iceberg we were able to kayak too; Instant memories made with some of our O trek friends; Traditional Chilean food served at Refugio Grey; A snap during the trek between Grey and Paine Grande; One of only two trails we saw these kind of markers on; The tent fencing in Paine Grande; My paid dinner in Paine Grande; Another shot of the campsite at Paine Grande
Day 6 (Paine Grande to Los Cuernos via Mirador Frances) is one of those pick your own adventure days. Depending on how you’re feeling you could just hike from Paine Grande to Los Cuerros skipping Mirador Frances and Britainco. The distance from Paine Grande to Camp Italiano (where you can leave your bag if you’re going to any of the miradors) is 7.5km. Due to flash flooding we didn’t make it all the way up to Mirador Frances let alone Britanico. We kind of made our own mirador by walking up the easier trail from Camp Italiano to Mirador Frances and then stopping once we had a nice enough view of the glacier. Some of our friends did make it all the way out to Britanico, they said it was okay but they were actually more impressed by Mirador Frances. Just for your information it is 2km from Camp Italiano to Mirador Frances and then from Frances to Britanico it’s an additional 3.5km, so roundtrip from Italiano all the way up to Britanico is about 11/12km. Once back at Camp Italiano it’s a 1 km hike to Camp Frances (you could camp here for the night) or 4.5km to Los Cuernos. The hike from Camp Italiano to Los Cuernos is moderate with up and down and some rocky bits that can be hard on your knees since you’ve been hiking for 6 days straight already.
At the campsite: Our fully equipped tent was back on a platform this evening! We were so excited to see yet another platform – it’s the little things you know? The only downside to our specific platform was that it was super far up and I may have fallen off of it a couple of times as there weren’t proper steps down. Los Cuernos has a super small mini mart but they were the first place we saw Doritos which was pretty exciting. We really loved the Refugio at Los Cuernos and were impressed with how clean the bathrooms were. There were 4 or 5 stalls of toilets and 4 or 5 showers for women as well. Men had a separate building entirely.


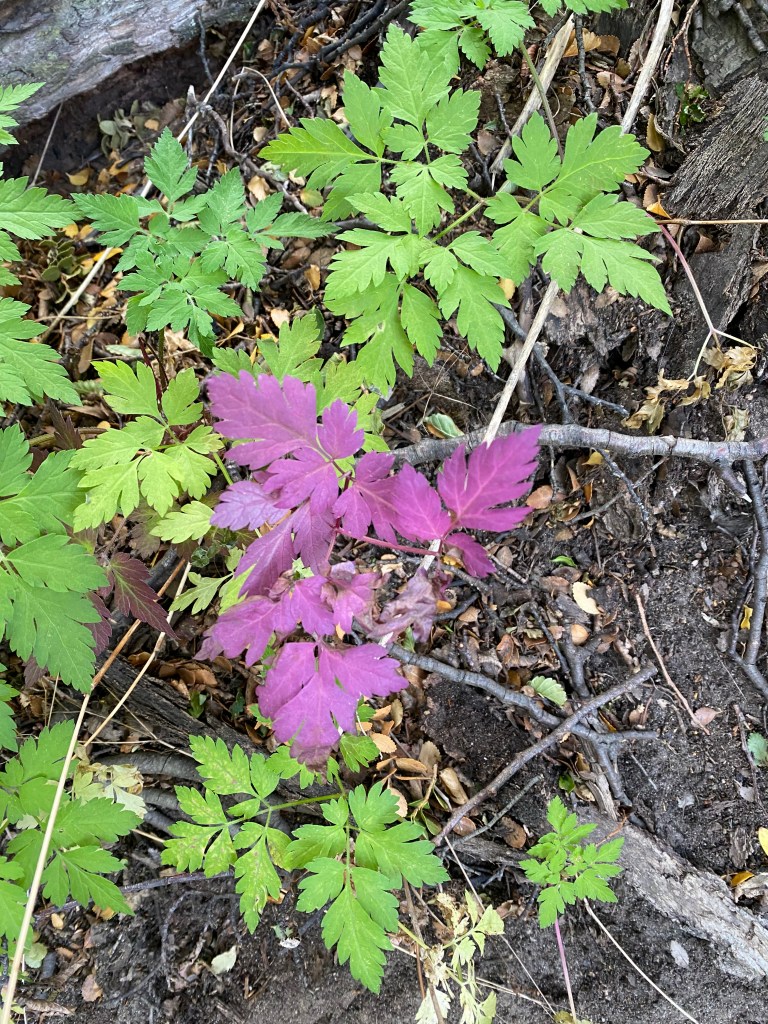

From left to right to center to bottom: The only photo I snapped between Paine Grande and Camp Italiano because of the weather; The only other trail we saw with these markers, only between Paine Grande and Camp Italiano though; On our way to Mirador Frances; Our own ‘Mirador’ Frances; I found the purple of these leaves stunning; Our tent in Los Cuernos; One of the beautiful views between Camp Italiano and Los Cuernos
Day 7 (Los Cuernos to Central) This was a long day, although only 13km, the first half of the trail is filled with steep ascents and descents. The second half is mostly flat with just a few rolling hills towards the end. The real disappointment of this hike is that you can spot camp WELL before you’re actually there. I found I actually preferred when camp just all of a sudden popped out of nowhere and I was done hiking for the day instead of the constant tease of being able to see camp ahead.
At the campsite: Our fully equipped tent was not on a platform however this was a proper 3 person tent and it was massive. We really enjoyed having all of the space on our last night camping. I didn’t shower here so I’m not sure how many showers there are but there were 4 toilets for women. There is also a small mini mart. The Refugio is across a small stream which made it the furthest away Refugio from campsite ratio that we stayed at the entire trip. If you do the full board option and also want to hike up Base Torres you can ask to have breakfast/box lunch served earlier in the morning. This is what we did. You’ll eat dinner in the Refugio and while we were there the mini mart wouldn’t sell alcohol, you could only but it from the bar at the Refugio. There are also lots of games and puzzles to keep you entertained at the Refugio.


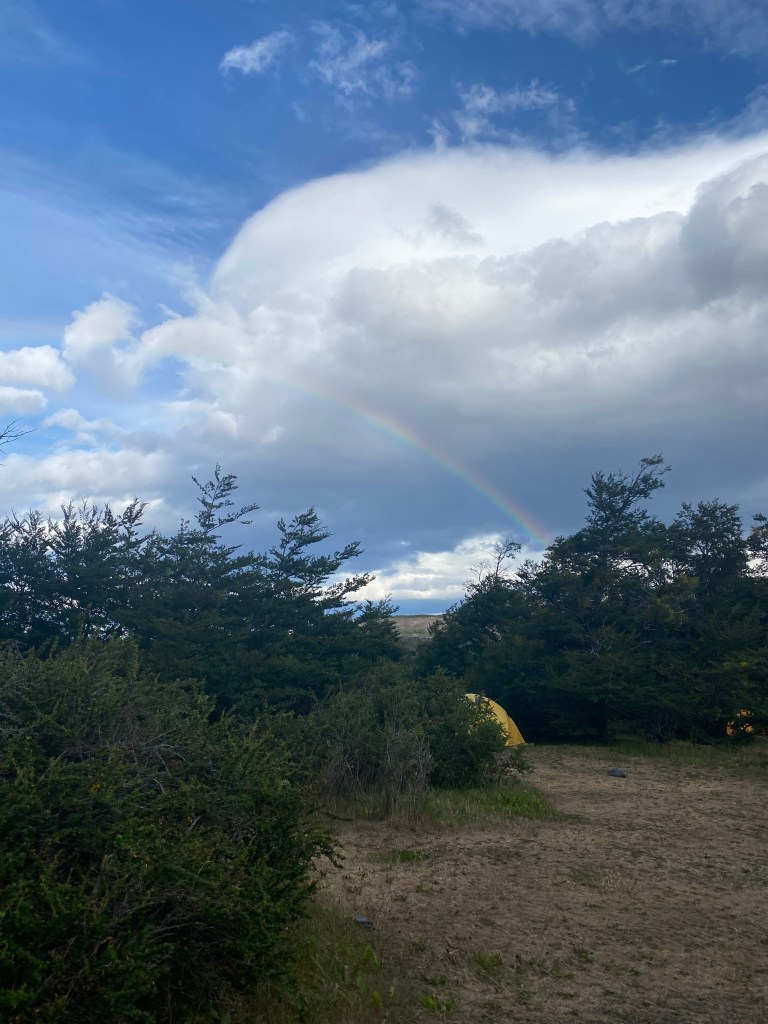
From left to right to center to bottom: Taken in the morning at Los Cuernos; One of the bridges between Los Cuernos and Central; View looking back on Torres del Paine; Reflection of the funky Patagonia clouds; These potatoes at Refugio Central were super yum; A rainbow over Camp Central; One last dinner with our O trek family at Refugio Central
Day 8 (Central to Base Torres to Central) This is a strenuous 20km round trip hike but so so worth it. Once you hit the trail you’ll immediately find yourself going up and up and up. There’s no real rolling hills until after Chileno, it’s just up. Once you’ve reached a bit of elevation you will come across the windy pass. This pass is very exposed to the open and the winds can really ramp up so be careful. We made a point of leaving camp between 5:30 to 6 so that we could beat the wind and also beat the day trippers that come. It is so worth leaving early. After the windy pass you’ll reach Chileno. The bathrooms here cost 1000 chilean peso but if you don’t feel like nature peeing it’s a real place to stop, use the bathroom and eat a snack before continuing on. It’s about another hour and a half to the mirador from Chileno (I don’t have the actual km’s for this but that amount of time was given to me by an experienced backpacker). The first half of the hike is a trail that is mostly wooded and goes up and down. After that it becomes a rock scramble with a solid elevation change as you go up. Again make sure you watch the markers, there’s a couple of places where it’s easy to lose them, and this is a dangerous place . Before you know it you’ll find yourself at Laguna Torres and the beautiful view that is Los Torres. We stayed for a bit before heading back down and were constantly stopped by massive groups of day trippers that were coming up. It took us significantly longer to get down because of this. Afterwards we hung out at the Refugio until it was time to catch the shuttle and then the bus back to Puerto Natales.


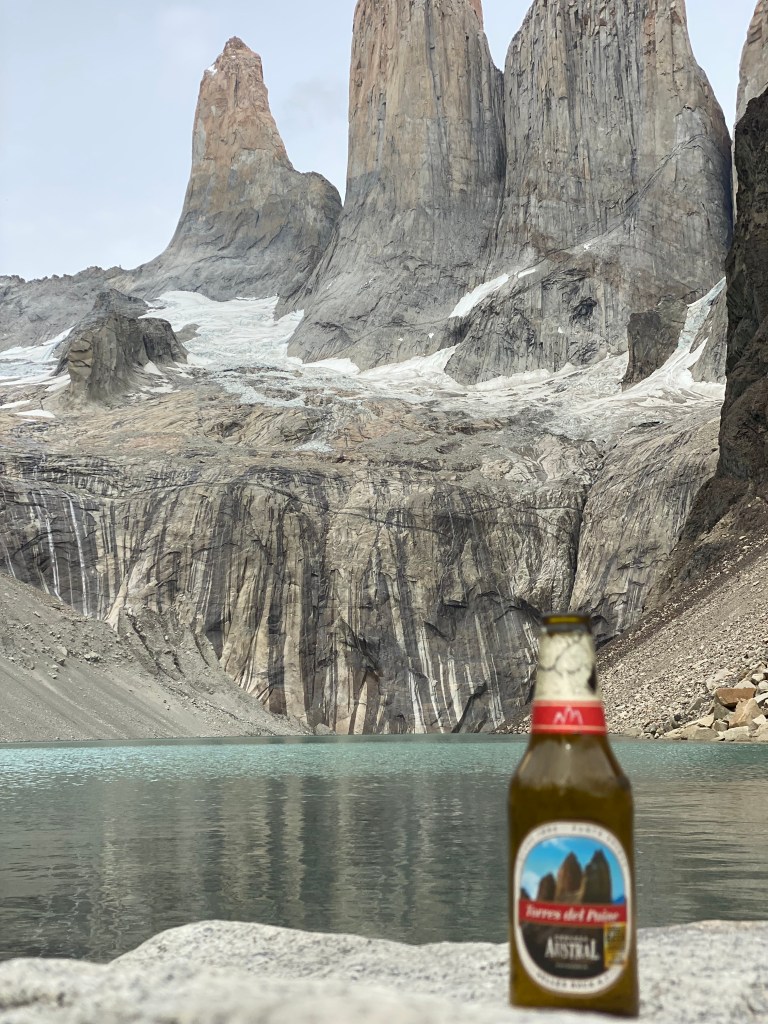


From left to right to center to bottom: Blurry sunrise at Central before our Mirador Torres hike; The beginning of the windy pass; Caught up with some of our O trek fam on the trail; Talia and I on the trail; Snapped just before you can begin to see the lake of Mirador Torres; Talia and I at the Mirador; The beer bottle I carted the entire day to take that photo; The Mirador and I; One last picture in Central but now that I’d completed the 120km or so of the O trek
What I packed (or wore the entire time) for the O trek:
- 1 pair of Lululemon leggings
- 1 pair of smart wool leggings
- 1 pair of quick dry light weight hiking pants
- 1 pair of spandex shorts
- 1 pair of waterproof pants (shell)
- 5 pairs of underwear
- 2 sport bras
- 1 lightweight bralette for camp
- 1 pair of sneakers for camp
- 1 pair of hiking boots
- 1 smart wool buff
- 3 plastic bags for trash
- Extensive first aid kit
- 1 quick dry tshirt to sleep in
- 1 waterproof jacket
- 1 quick dry zip up hoodie
- 1 down vest
- 1 down/puffy jacket
- 2 long sleeve quick dry shirts
- 1 smart wool long sleeve shirt
- 1 fleece
- 3 pairs of darn tough socks
- 1 pair of ankle socks
- 1 warm hat
- 1 baseball hat
- My camera, additional lens and an additional charged battery
- 1 set of trekking poles
- 1 battery pack
- 1 USB C fast cord and wall plug
- 1 USB lightening cord for the bus
- 1 kula cloth
- 1 trovel
- 1 roll of toliet paper
- 1 head torch
- 1 knife
- A small set of toiletries (travel size toothpaste and shower gel)
- 1 pair of sunglasses and regular glasses
- Protein bars, chocolate, dried fruit and nuts as snacks
What I didn’t use:
- My thermals, but I tend to run warm. Talia wore her thermals every day
- I only used one of the long sleeve quick dry shirts, I just didn’t feel like getting the other one dirty
- I ended up only wearing the same sports bra every day so I didn’t need to bring the additional one.
- I didn’t use my kula cloth but that’s only because I never needed to go the bathroom while we were hiking (I know probably unhealthy but that’s what my body was telling me).
- My spandex shorts, we didn’t get the best weather. Additionally a lot of the trails have brush on the sides of them that you could easily cut yourself with when hiking in shorts
- I overestimated on my snacks and brought too much. This was mainly because I just didn’t eat as much hiking as I thought I would. Additionally my main snack were protein bars and we ended up getting protein bars in every box lunch we had – if I had known that I would have brought half as many bars.
Some left over thoughts that I didn’t cover in the above sections:
- If you want to book with the woman we booked through her name is Oriane. Her WhatsApp is +56986999178 or her email is oriane.gippa@hotmail.fr, I do think she prefers contact over WhatsApp. Something to know is that payment will be over paypal, and her descriptions of the days can be a bit misleading. If you book with her the bus ticket and park fees will be included in her pricing, you’ll just have to make sure you keep a minimum of 6000 chilean pesos per person to take the mini bus from the entrance of the park (Laguna Amara) to central. You can walk this but the hike is mostly on road and people drive pretty insane on this stretch of road. I would highly suggest paying for the mini bus. Also, the hostel that she’ll offer for you to stay before or after the trek is one of the nicer ones in town. Attached to the hostel you’ll find a gear place to rent anything you might need for the trek as well. Talia was going to rent from the hostel but they didn’t have her size so she ended up going down the street to Yaganhouse. She rented hiking boots, waterproof pants and trekking poles. She spoke highly of the quality and condition of their gear.
- In case it isn’t clear, the O trek encompasses the W trek. If you do the O trek in its entirety you will also do the W trek in its entirety.
- If you book full board be aware it’s a lot of food. If you’re someone who doesn’t eat a lot when they actually hike, I’d suggest not getting a boxed lunch, especially if you’re traveling with someone else. We got to a point where Talia and I just shared one box to not waste food because we just weren’t eating that much when hiking. Additionally with the exception of Paine Grande the food was so delicious and the portion sizes were generous so you just weren’t hungry. I should also state that I’m a vegetarian but Talia isn’t, even for both of us it was still a lot of food. Some days the veg options were better than others, but there was still always a veg option.
- Also, be aware that opting in for breakfast means going with the Refugio times. Most days as a vegetarian there wasn’t much in the way of brekky for me anyways however, it still meant we couldn’t leave as early since Talia wanted to eat breakfast (and we’d paid for it). Knowing what I know now, I probably would have only purchased dinner and would have carried slightly more snacks to make up for the lack of breakfast. However, it was a nice structure to force us to have breakfast before hiking.
- As someone who’s never done a multi day trek like this before, I would have worked on strengthening some of my left muscles before this trek. Specifically it’s your knees that take a lot of heat after multiple days of trekking. I would have looked into what stretches I could have done to help with this.
- The John Gardner Pass can obviously get really bad weather and the worst part of the weather is you don’t realize how cold it can get. Talia didn’t have the best gloves on her and was questionably close to frost bite. I would definitely make sure you have a good, but lightweight (since this is the only day you will most likely need them) set of gloves.
- The buff was essential. Pack the buff even if you’re somewhere you wears glasses, it’s annoying but you’ll want it.
- I brought my battery pack even after talking to someone who’d done the W trek before me and had told me I wouldn’t need it. She wasn’t wrong, however, by the end of the trek I did end up using it. This wasn’t because I didn’t have access to electricity, it was mostly because I wanted to hang out in places where the outlets weren’t. So I would still suggest on bringing a battery pack because it might make your life easier but if you really want to cut down on weight you can do without it.
- Having the O circuit downloaded on Alltrails was helpful in certain places where we lost the trail but I would strongly make sure you follow the signs over all trails. Sometimes the app could be a bit misleading at times.
- There is wifi available for purchase at most of the camps. I believe the only camps on the O trek were there wasn’t wifi was at Dickson and Los Perros. I did not purchase wifi so I can’t speak to the prices.
- Do be aware sometimes the bus can run late. Our 7:30 bus didn’t come until 8:15pm. If you don’t see your bus company ask the bus drivers not CONAF. The bus drivers all seem to know where the other buses are.
I hope this helps if you plan on doing the O trek and feel free to reach out if you have any questions. Happy trails y’all!
And congrats on making it to the end of this lengthly blog post, as a treat here’s a video that only begins to explain the wind we experienced on the pass. This video is not mine, it was filmed by Andres and you can see his partner Fernanda in the video as well, they were a part of our O trek family.

August 12, 2023 at 11:27 pm
Great information,thanks. One question, if you are fixing your own meals is there a place to leave your trash at the campsites or do you have to take the packaging with you?
LikeLike
August 12, 2023 at 11:32 pm
Hi Tammy,
Thank you! Officially the park is carry in/carry out. However, we saw trash cans at Seron, Dickson and all of the camps once we hit the W trek (so from Grey onwards). Hope that helps.
LikeLike
August 13, 2023 at 4:13 am
Hi,
Great thank you for the information.
LikeLike
September 2, 2023 at 3:00 am
Great info! I am a bit fearful of heights and I’m wondering if there were any narrow paths with steep drop offs on the o trek?
LikeLike
December 29, 2023 at 11:53 am
Hi, I’m sorry! I thought I replied to this and I didn’t. There are a couple of paths that we encountered that did have steep drop offs. If I remember correctly they were actually on days that were part of the W trek as well. Also the windy pass which you have to take in order to get to mirador los torres is essentially this as well.
LikeLike